The sample pipeline consists of seven separate tasks, and one interactive utility:
- dat2gif: Move data into pipeline (rename files from *.dat to *.gif)....
- This task is a shell script which is run interactively by the user to start data flowing through the pipeline. It requires two input parameters from the user; the script will prompt the user for them. See an example of using dat2gif in the description of how to run the sample pipeline.
- gifin (IN): Introduce images into the pipeline....
- This task is a shell script combined with an OPUS task. It demonstrates how easy it is to get an observation started in an OPUS pipeline. This task is a file poller, in that it looks for disk files in a particular directory meeting a specific file mask. When such a file is found, this pipeline step does the job of creating an OPUS Observation Status entry (OSF) for the dataset, which makes the dataset visible to the next stages in the OPUS sample pipeline for more processing.
- getkw (KW): Retrieve keywords from the "database"....
- This task is a shell script which extracts the values of keywords from a "database". The sample pipeline uses an ASCII flat file as its database. The keywords and values are written to another ASCII file for use in later pipeline stages.
- holdup (HD): Do some simulated work...
- The task is a shell script which simulates doing useful pipeline work by just pausing. The purpose of this task is to display the parallel processing capability of the OPUS system. This task and the getkw task run in parallel on each dataset that comes through the pipeline. When a dataset completes the gifin pipeline stage, it is automatically registered to begin both the getkw and holdup pipeline stages simultaneously.
- g2f (FT): Convert GIF to FITS files....
- The work of the telemetry conversion is performed by a single executable, g2f. It converts a GIF image into a standard FITS file, ordering and writing the keywords to the FITS headers.
- listhd (LH): List the header parameters from a FITS file...
- This task is a shell script which runs a small OPUS task that dumps the contents of the FITS header keywords in a FITS file to a text file.
- comprs (CZ): Compress a FITS file....
- This task is a shell script that uses the UNIX "compress" command to compress a FITS file.
- pipect: Pipeline statistics....
- OPUS tasks can be triggered by the existence of a file of a specified type in a certain directory (see gifin), by the flags in the OPUS Observation Status entry, or OSF, (see g2f), or by an absolute or relative timer. This task is triggered every 30 seconds by a relative timer. (A simple modification of the process resource file allows you to control the timer.) Statistics are compiled by counting the number of certain file types in the pipeline each time the task awakens. The first column of the log file contains a time stamp, the second counts the number of files not in the pipeline yet, and the remainder of the columns correspond to the stages of the sample pipeline -- with the exception of the holdup stage, which has nothing to count. The file can be used to measure the throughput of the sample pipeline processing. See the pipect.csh and pipect.resource files for more details.
- cleandata (CL): Deletes data files...
- This task deletes the GIF and FITS files produced by the sample pipeline. It should only be run when the data in the pipeline is no longer needed.
- cleanosf (CL): Erase completed OSF entries...
- This task deletes OSFs which match the trigger condition in the cleanosf.resource file..
How do I run the sample pipeline?
%source ~/.cshrcPerforming that step will also source the opus_login.csh because the installation script now adds a line in your ~/.cshrc file to source the opus_login.csh. This change is due to new start up procedures for processes.
Start the OPUS servers
by running the opus_server_monitor utility. Once this utility
exits, an instance of opus_env_server and opus_bb_server
should be running.
Next run the Process Manager (PMG) by clicking on the PMG icon, or, on Unix, entering:
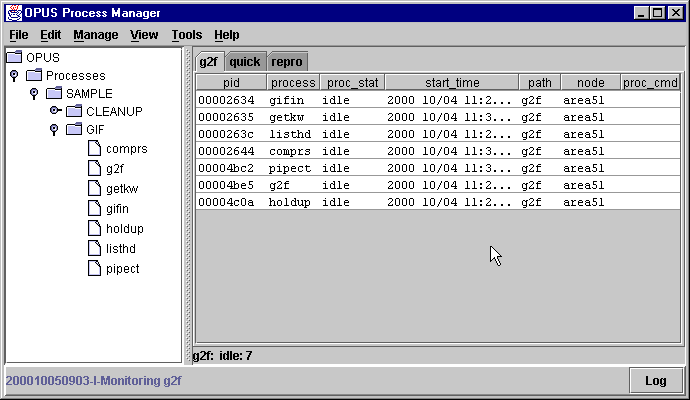
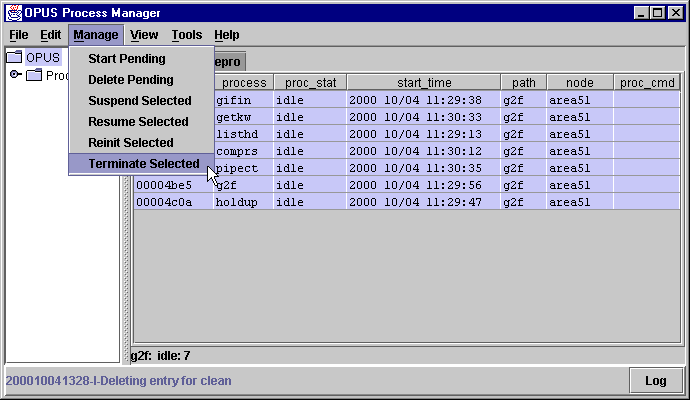
%PMGYou will get a Java application window that looks something like this:
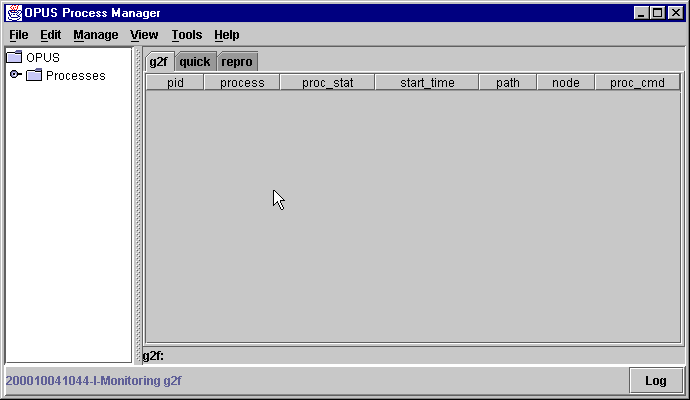
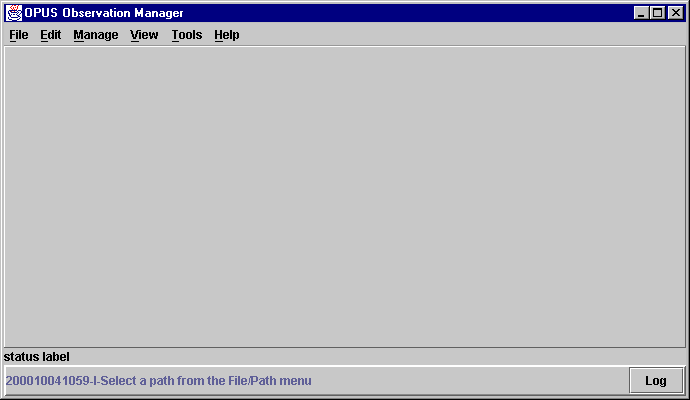
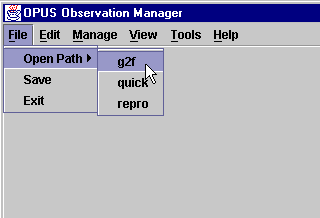
Next go back to the PMG and choose "Select Nodes" from the "Tools" pull down menu:
![[Select Nodes]](gif/pmg_nodeselect.gif)
If you haven't yet defined a filter for selecting your nodes, you are asked to do so at this point. A filter like '.stsci.edu' will scan for nodes containing that string. If you leave the selection blank, all nodes found in your /etc/hosts file will be selected.
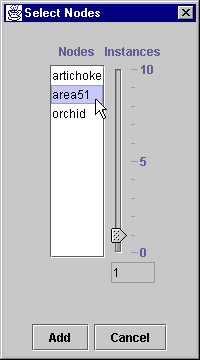
This brings up a dialog listing all of the nodes that OPUS knows about (this information comes from the /etc/hosts file on the system running the server):
![[PMG Define Nodes window]](gif/pmg_nodelist.gif)
Use the mouse (holding the Ctrl key down) to select any number of nodes for your personalized list. That list of nodes will be used for your current session of the PMG. If you want to save that list in your personalized environment, use "File.Save".
Next, expand the "Processes" tree, the SAMPLE tree, and the GIF tree in turn. This will display all the processes for the sample pipeline.
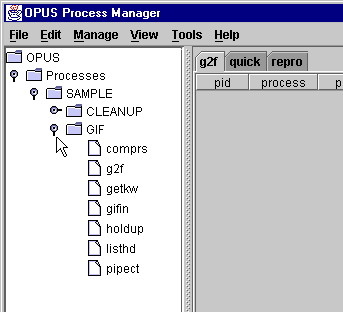
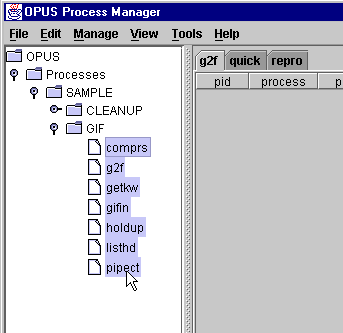
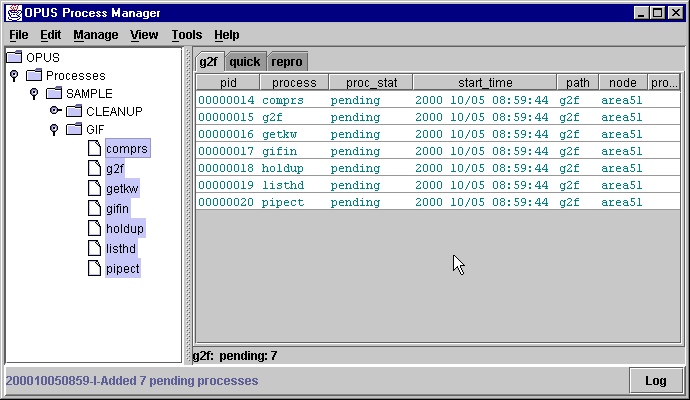
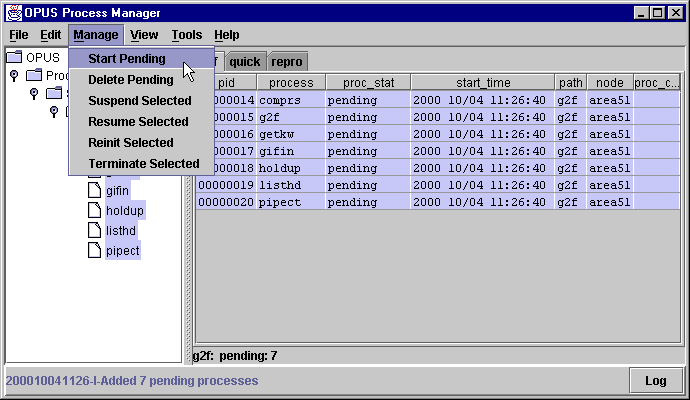
g2f.path g2f.resourceThe path file describes the directories used by all the processes we plan to bring up in the sample pipeline; the resource file describes the attributes used to run a copy of the process g2f.
See the question under the PMG section about bringing
up a pipeline process for more details about selecting processes.
To start data flowing through the pipeline, the input GIF data files need to be moved to the input directory for the sample pipeline. This input directory is defined in the resource file for the gifin process, under the INPATH entry, which looks something like:
   ENV.INPATH   = gif_data ! Directory where the input files are found
                           ! This entry is in gifin.resource
Find the corresponding entry for "gif_data" in your g2f.path file
gif_data = ~/opus_test/g2f/input/So in this example the gifin process will look for input data files in the directory ~/opus_test/g2f/input (the translation of INPATH for the gifin process).
You might wonder why you have to copy the data from the install area to your local data tree -- why the software doesn't just look for the files in the install tree. There are two reasons.
First, the data files get renamed during pipeline processing. If more than one user is trying to run the pipeline from the same configured tree at the same time, the renaming of these files would conflict between users. Therefore, it's safer and cleaner to move the files to be processed into a user's local area.
The other reason for copying the input data files into your own directory is that by doing so you can choose just how much data you want to process at a given time. There are 256 GIF data files. You may not want to drop them in the pipeline all at once! You certainly can do that, but you may want to start out with just a few until you are satisfied that your environment is set up correctly.
We have provided an interactive utility to help you move the data. The utility is called dat2gif (it will also rename the files from "*.dat" to "*.gif" during the move). It requires two input parameters; the script will prompt you for them. Wildcards are accepted:
 % dat2gif
    File(s) to copy: /data/opus32/gif/gif95*
    Path name (e.g., g2f): g2f
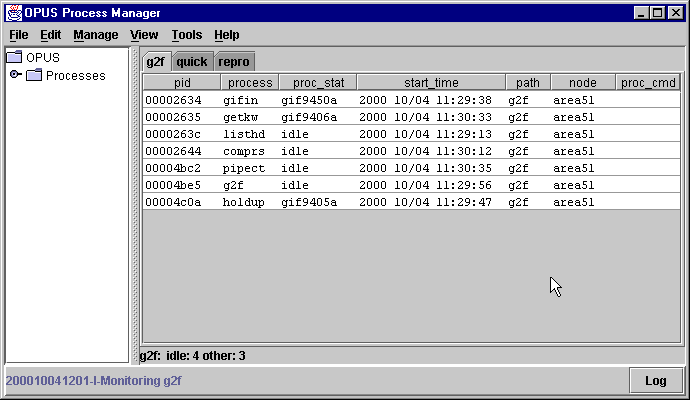
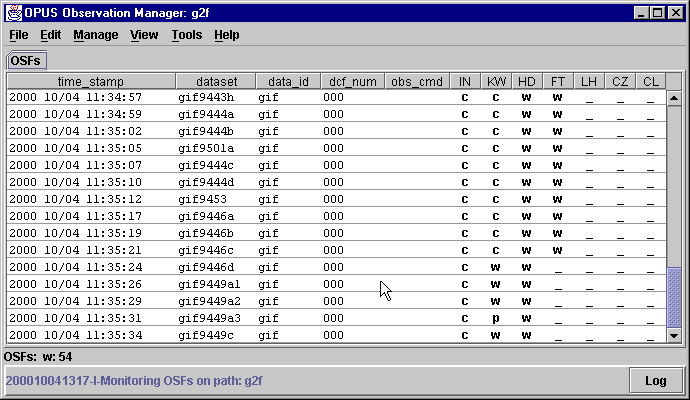
As files appear in the gifin input directory, the pipeline processes listed in the PMG should begin to list dataset names -- the status fields should change from the IDLE state to indicate work is being done.
How much disk space do I need to run the sample pipeline?
Do I need a database to run the sample pipeline?
The sample pipeline uses only flat files for input and output. However,
there is nothing to prevent you from writing your own database-dependent
applications. (The HST pipeline
uses a database extensively, for example.) But in order to keep the sample
pipeline simple, we have removed any database dependency.
Can I use the FITS files to do science?
First of all the public release images (the original GIF files in the sample pipeline) are often composites, not raw science data. They have been processed to make a scientific point, but in so doing, some of the original signal has been modified or lost.
Second, the header information in the FITS files is simulated. Since
the original public release images were often composites of separate exposures
it was not possible to correlate the image with a specific observation.
The keyword values are taken from an exposure which might be similar to
one of the composite observations.
How does OPUS make things easier?
First, on the same machine, bring up several copies of the g2f task. Use the Process Manager (PMG) to select the same task on the same machine several times. The pipect task will monitor the pipeline throughput and produce a summary report when it is terminated. That report, described in the first question, as well as the wall clock time required to complete the sample dataset, should demonstrate the benefit of multiple instances.
It is still possible to swamp the resources on a single machine with
too many tasks. Try bringing up several copies of the g2f
process on different machines to determine what the best mix of tasks and
machines best suits your configuration.
What do I have to do to rerun the sample pipeline?
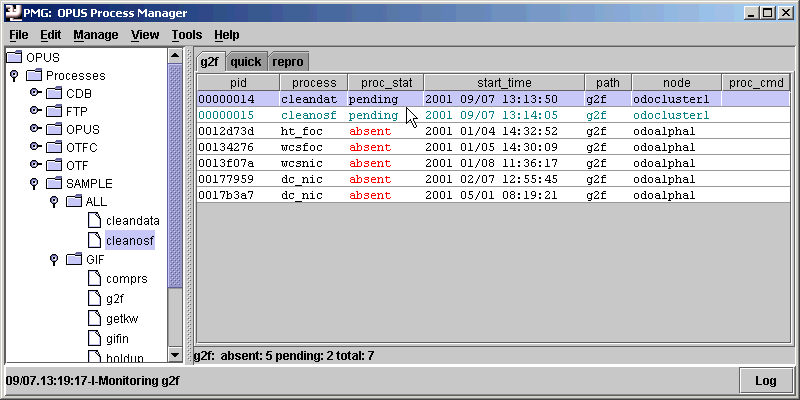
Go back to the PMG, open the "ALL" class, and drag the "cleanosf" task and "cleandata" task to the g2f pipeline. As before it will show up as a pending task.
You will not have to terminate/restart any of the pipeline processes to rerun the data, but do note that you will still be using the same pipect.log file as was used in the initial run of the data (the pipect.log is the output from the pipect process -- the pipeline process that tracks pipeline statistics). If you wish to start with a new pipect.log file, you will have to terminate your pipect process and then manually delete (or rename, if you wish to save) the file from
~/opus_test/[path]/fits/pipect.log(where [path] is the path the data is being processed through [e.g., "g2f"]). You can then start up a new pipect process. All that you need to do now is run the dat2gif command to copy the gif*.dat files into the input directory as you did for the initial run of the data.
You will want to make sure that the pipeline output
directories are clean before rerunning the data or anomalous pipeline
behavior will result.
What does it mean if a process is marked "absent" on the PMG display, and what do I do?
The observation which was being processed when the task exited can easily be identified. One way is to examine messages in the process log file just before the crash. It is good practice to have each process print the name of the exposure it is beginning to process for this kind of troubleshooting. Another way to determine what the process was doing when it exited is to use the OMG. The OMG column for the "absent" process should be marked with an "x" on one of the lines on the display.
Often the problem can be traced to "bad data", an unexpected value in
the data stream which was not handled correctly by the software. If you
have confidence that no other observation is likely to have the same problem,
then you can use the PMG to
start up another copy of the failed process. Or, if you already have multiple
instances of the failed process running in the pipeline, then you probably
will not notice any consequence of the failed process besides the failure
of a single observation; other instances will just have to do the work
of the failed process.
Why do some GIF images fail the KW step in the sample pipeline?
  gif9508x01
  gif9508x02
  gif9508x03
  gif9508x04
  gif9508x05
We intentionally inserted a few error cases to demonstrate how the Observation Status entries (OSF) are set in the case of a processing error.
How do I determine if the process status files are created?
You can check this by listing the files in your OPUS_HOME_DIR directory:
%ls $OPUS_HOME_DIR/*_*The process status entries probably all contain at least one underscore.
How do I determine if the Observation Status Files are created?
Alternatively, to determine where these files are kept, search the path file for the OPUS_OBSERVATIONS_DIR definition:
   %set pathname = `osfile_stretch_file OPUS_DEFINITIONS_DIR:g2f.path`
   %grep OBS $pathname
    OPUS_OBSERVATIONS_DIR = /home/mydir/obs
   %ls /home/mydir/obs/
The OPUS utility osfile_stretch_file is used to find the first disk file g2f.path under the "stretched" environment variable OPUS_DEFINITIONS_DIR (similar to a Unix path). Since OPUS_DEFINITIONS_DIR can be defined to stretch through one or more local directories and then through the OPUS system directories, the utility is used to search the directories in the stretch for the first occurrence of the file. This allows the user to create local copies of some OPUS system files that override the official copies in the OPUS system directory tree.
In what order are datasets processed in the pipeline?
To force the use of the sort option of glob, set an environment variable in your login shell or OPUS_DEFINITIONS_DIR:opus_login.csh file for
setenv OPUS_SORT_FILES
This will cause OPUS to perform all file searches using the sorted glob
(which collates in LC_COLLATE order; see your operating system documentation
for more information). This likely will result in alphabetically ordered
searches.
Can I run more than one conversion process (g2f) in the pipeline?
However, you cannot necessarily run multiple copies of every process.
For instance, you will find if you attempt to start up more than one gifin
task, that you will only get one instance of it. This is because it is
restricted in the OPUS_DEFINITIONS_DIR:pmg_restrictions.dat
file.
How do I distribute processes over different machines?
How do I bring up multiple instances of the pipeline?
Then, in the Process Manager (PMG), when selecting the processes to run in your pipeline, specify the new path you have defined.
The easiest way to do this is to save
your pipeline as a file, edit the path names in that file, save the
file with a new name, and load that pipeline definition in the PMG.
How do I determine if one of the processes has crashed?
How do I know when the processing is complete?
How do I turn the pipeline off?
What happens if I run out of disk space?
Note that a "block" is 512 bytes. An easy
way to view the resource file is described in the Process
Resource Files document.
I can't find the output for this sample pipeline!
OUTPATH = fits_data ! Directory where output files are writtenAnd in the g2f.path file (if that's the path you are running in), "fits_data" is defined as:
fits_data = ~/opus_home/g2f/fits/So in this example the g2f process will place output data files in the directory ~/opus_home/g2f/fits (the translation of OUTPATH for the g2f process).
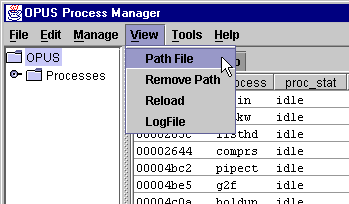
An easy way to view the resource file is described in the Process Resource Files document. An easy way to look at your path file is to select the "Path File" option in the "View" menu of the PMG.
How do I display the results to verify the operation?
xv is able to display the FITS
files as well as the GIF files. The FITS files can also be viewed with
a FITS display package. SAOimage can handle FITS files, as will IDL.
xv
will also decompress compressed images, so it can be used to view the compressed
FITS files as well.
Why are the images in the FITS files monochromatic?
How do I verify that the FITS files comply with the standard?
   %fitsverify picasso_raw.fits
   FITS++ Verification Program Version 1.10
   Wed Aug 20 11:27:18 1997

   ===================================================================
   FITS Verification for file:  picasso_raw.fits


   ===================================================================
   Summary contents of FITS file: picasso_raw.fits

   0:  Primary Array ( BYTE ) 2 dims [370,495]
                   183150 bytes, 243 header lines, 71 FITS blocks
   No special records.

   ===================================================================
   No problems were encountered.
Note that the version number may change over time.
Is there an easy way to list the keywords in a FITS file?
We have included in the distribution a task called listhead which will list the headers of the FITS file. The task runs as part of the sample pipeline and produces ASCII files of header keywords and values in the output directory.
The task can also be run interactively. For example, just type:
%listhead 9707_raw.fitsThis command will produce a file called 9707_raw.lis which contains the keyword lines in ASCII format. The sample pipeline would name the ASCII header file for this example: gif9707.hdr.
The listhead task can now handle wildcards in the source argument, as well as directory/logical names in the destination argument.
- listhead \*.fits
- lists FITS headers for all FITS files in current directory to the same directory, with output names *.lis
- listhead \*.fits N_DADS_DIR
- lists FITS headers for all FITS files in current directory to the directory defined by the N_DADS_DIR environment variable
- listhead OCAL:\*.fits O_DADS_DIR
- lists FITS headers for all FITS files in the directory defined by the OCAL environment variable to the directory defined by the O_DADS_DIR environment variable
- listhead o3s41010q.fits -f MYDISK:o3s41010q.hdr
- lists FITS header for a specific FITS file to a specifically named output file
Can OPUS do parallel processing?
- IN: Initialization
- KW: Keyword selection
- HD: Hyperdynamic Defreezer
- FT: GIF to FITS converter
- LH: List FITS header
- CZ: File compression
The normal pipeline processing is linear and sequential
IN------>KW------>FT------->LH------->CZOPUS allows you to have any number of these processes up at a time
                          FT
        IN------>KW------>FT------->LH------->CZ
                          FT                  CZ
                          FT
In addition we have provided another sample task that runs in parallel with the getkw (KW) task. Since the KW and the HD tasks do not require exclusive access to the same resources, they can and do run simultaneously:
                 HD------>FT
        IN------>KW------>FT------->LH------->CZ
The g2f (FT) process will wait until both the HD and the KW tasks are complete for a dataset before proceeding.
How do you make a process wait for the completion of two tasks?
   OSF_RANK = 1                    ! First Trigger
   OSF_TRIGGER1.FT = w             ! Need a 'Wait' in FT stage
   OSF_TRIGGER1.KW = c             ! Need a 'Complete' flag in KW column
   OSF_TRIGGER1.HD = c             ! Need a 'Complete' flag in HD column
   OSF_TRIGGER1.DATA_ID = gif      ! Also need the Data_id set to GIF
How can I run parallel pipelines (paths)?
By way of example, assume you wanted the following three pipelines:
production pipeline:
                  HD------>FT
        IN------->KW------>FT-------->LH------->CZ
                           FT                   CZ
                           FT
quicklook pipeline:
IN------->KW------>FT-------->LHreprocessing pipeline:
                  HD------>FT
        IN------->KW------>FT-------->CZ
By slightly modifying the process resource files, and changing their names to make them distinct, you can set up a variety of pipelines which can be run simultaneously.
The TASK line of your new file must point to the name of the new resource file. So, for example, if you are copying and renaming the g2f.resource file to myg2f.resource, you need to change the task line from
TASK = < g2f -p $PATH_FILE >to
TASK = < g2f -p $PATH_FILE -r myg2f >Also, the process resource files must not refer to stages which are not present in the path. Thus if the g2f process ordinarily refers to the HD process:
OSF_TRIGGER1.FT = w             ! Need a 'Wait' in FT stage
OSF_TRIGGER1.KW = c             ! Need a 'Complete' flag in KW column
OSF_TRIGGER1.HD = c             ! Need a 'Complete' flag in HD column
and if one pipeline does not contain a HD task, then OPUS will complain violently about the third line above. Thus to ensure that the task will run in such a pipeline you need to modify your new resource file and remove any reference to the HD task. If the task is mentioned in more than one resource file, be sure to copy, rename, and modify all of them.
The next step is to determine how the data in each of the pipelines is to flow; what directories will be used. In the simple sample pipeline you might just want three different input directories, and three different output directories. In that case you need to create those directories in your environment. For example, if you started with:
        Input directory:        /home/my_name/opus_test/g2f/input/
        Output directory:       /home/my_name/opus_test/g2f/fits/
You might then just create three unique directories:
        Input directories:      /home/my_name/opus_test/prod/input/
                                /home/my_name/opus_test/quick/input/
                                /home/my_name/opus_test/repro/input/
        Output directories:     /home/my_name/opus_test/prod/fits/
                                /home/my_name/opus_test/quick/fits/
                                /home/my_name/opus_test/repro/fits/
The next step is to define three different path files. You can use the g2f.path as a template for the three paths. You might start out with:
   STAGE_FILE            = OPUS_DEFINITIONS_DIR:g2f_pipeline.stage
   OPUS_OBSERVATIONS_DIR = /home/my_name/opus_test/g2f/obs/
   gif_data              = /home/my_name/opus_test/g2f/input/
   fits_data             = /home/my_name/opus_test/g2f/fits/
   hdr_data              = /home/my_name/opus_test/g2f/fits/
   sample_db             = /home/my_name/opus/db/
You would want to create three paths with the names of the different directories substituted:
prod.path
 STAGE_FILE             = OPUS_DEFINITIONS_DIR:prod_pipeline.stage
 OPUS_OBSERVATIONS_DIR  = /home/my_name/opus_test/prod/obs/
 gif_data               = /home/my_name/opus_test/prod/input/
 fits_data              = /home/my_name/opus_test/prod/fits/
 hdr_data               = /home/my_name/opus_test/prod/fits/
 sample_db              = /home/my_name/opus/db/
quick.path
 STAGE_FILE             = OPUS_DEFINITIONS_DIR:quick_pipeline.stage
 OPUS_OBSERVATIONS_DIR  = /home/my_name/opus_test/quick/obs/
 gif_data               = /home/my_name/opus_test/quick/input/
 fits_data              = /home/my_name/opus_test/quick/fits/
 hdr_data               = /home/my_name/opus_test/quick/fits/
 sample_db              = /home/my_name/opus/db/
repro.path
 STAGE_FILE             = OPUS_DEFINITIONS_DIR:repro_pipeline.stage
 OPUS_OBSERVATIONS_DIR  = /home/my_name/opus_test/repro/obs/
 gif_data               = /home/my_name/opus_test/repro/input/
 fits_data              = /home/my_name/opus_test/repro/fits/
 hdr_data               = /home/my_name/opus_test/repro/fits/
 sample_db              = /home/my_name/opus/db/
Finally, since each path has a different number of steps, you should create its own path-specific pipeline.stage file. The prod_pipeline.stage file would be identical to the g2f_pipeline.stage file, and only has to be copied:
   %cd /home/my_name/opus_test/definitions
   %set fname = `osfile_stretch_file OPUS_DEFINITIONS_DIR:g2f_pipeline.stage`
   %cp $fname prod_pipeline.stage
However, the other two paths have fewer steps and require modification of the g2f_pipeline.stage file. For example, the quick_pipeline.stage file would appear as:
   NSTAGE = 4
   STAGE01.TITLE = IN
    STAGE01.DESCRIPTION = "GIF INIT"
   STAGE02.TITLE = KW
    STAGE02.DESCRIPTION = "Database select"
   STAGE03.TITLE = FT
    STAGE03.DESCRIPTION = "GIF to FITS"
   STAGE04.TITLE = LH
    STAGE04.DESCRIPTION = "List FITS Header"
Then you need to change which path is being monitored in an OMG.
![[OPUS]](gif/opus.gif)